Brisket Trimming: A Detailed Guide for Perfect BBQ
Properly trimming a brisket is a crucial step in achieving a tender, evenly cooked, and bark-rich final product. This detailed guide will walk you through the process and the essential tools you’ll need.
Essential Tools:
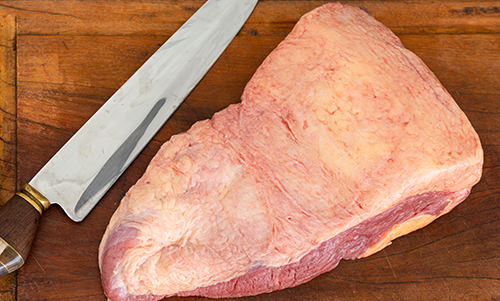
- Sharp Boning Knife: A 6-inch boning knife with a thin, flexible blade is ideal for navigating around fat and silver skin.
- Large Cutting Board: A sturdy, non-slip cutting board provides a safe and stable surface to work on.
- Disposable Gloves: Keeping your hands clean and preventing contamination is important.
- Paper Towels: For gripping the silver skin and wiping away excess fat.
- Trash Can or Bowl: To discard the trimmed fat and silver skin.
Step-by-Step Trimming Process:
- Chill the Brisket: Ensure your brisket is cold straight from the refrigerator. Cold fat is much firmer and easier to trim cleanly.
- Identify the Fat Cap: Place the brisket on your cutting board with the thick layer of fat (the fat cap) facing upwards. This is usually the side that was on the outside of the cow.
- Trim the Fat Cap for Even Thickness: The goal is to trim the fat cap down to an even thickness of about 1/4 inch (6mm). This layer will render during smoking, keeping the meat moist and adding flavor.
- Start by making long, smooth cuts, following the contour of the meat.
- Remove any excessively thick areas or hard, white pieces of fat, which don’t render well.
- Don’t be afraid to remove a significant amount of fat at this stage.
- Shape the Brisket for Aerodynamics and Even Cooking: Look for any thin, pointed edges or uneven sections of meat. These areas tend to cook much faster and can dry out before the thicker parts are done. Trim these to create a more rectangular and uniform shape.
- Address Hard Fat Pockets: Flip the brisket over and examine the underside. Identify and remove any large, hard pockets of fat that are embedded within the meat. These won’t render properly and can create undesirable textures.
- Remove the Silver Skin (Optional but Recommended): On the underside, you’ll likely see a thin, shiny, and often iridescent membrane called silver skin. This connective tissue shrinks and becomes leathery during cooking, preventing smoke penetration and affecting the tenderness.
- Use your knife to lift a corner of the silver skin.
- Grip the lifted edge firmly with a paper towel for better traction.
- Pull the membrane away from the meat in long, smooth strips. It’s best to work slowly and carefully.
- Remove as much of the silver skin as possible.
- Final Touches and Inspection: Take a final look at your trimmed brisket. Ensure there are no jagged edges, overly thick fat deposits, or remaining large sections of silver skin.
- Save the Trimmings (Optional, Reduce Waste): Don’t discard your brisket trimmings! They are valuable.
- They can be ground up with other cuts of meat to make flavorful ground beef.
- They can be rendered slowly over low heat to create beef tallow, a fantastic cooking fat with a high smoke point and rich flavor.
Key Trimming Tips for Success:
- Sharp Knife is Crucial: A dull knife will make the job frustrating and result in ragged cuts. Keep your boning knife sharp.
- Don’t Over-Trim the Fat: While you want to remove the hard fat, a consistent 1/4-inch layer of fat cap is beneficial for moisture and flavor.
- Focus on the Hard Fat: The soft, intramuscular fat (marbling) is what makes brisket delicious. You want to preserve this.
- Take Your Time: Trimming a brisket properly takes patience. Don’t rush the process.