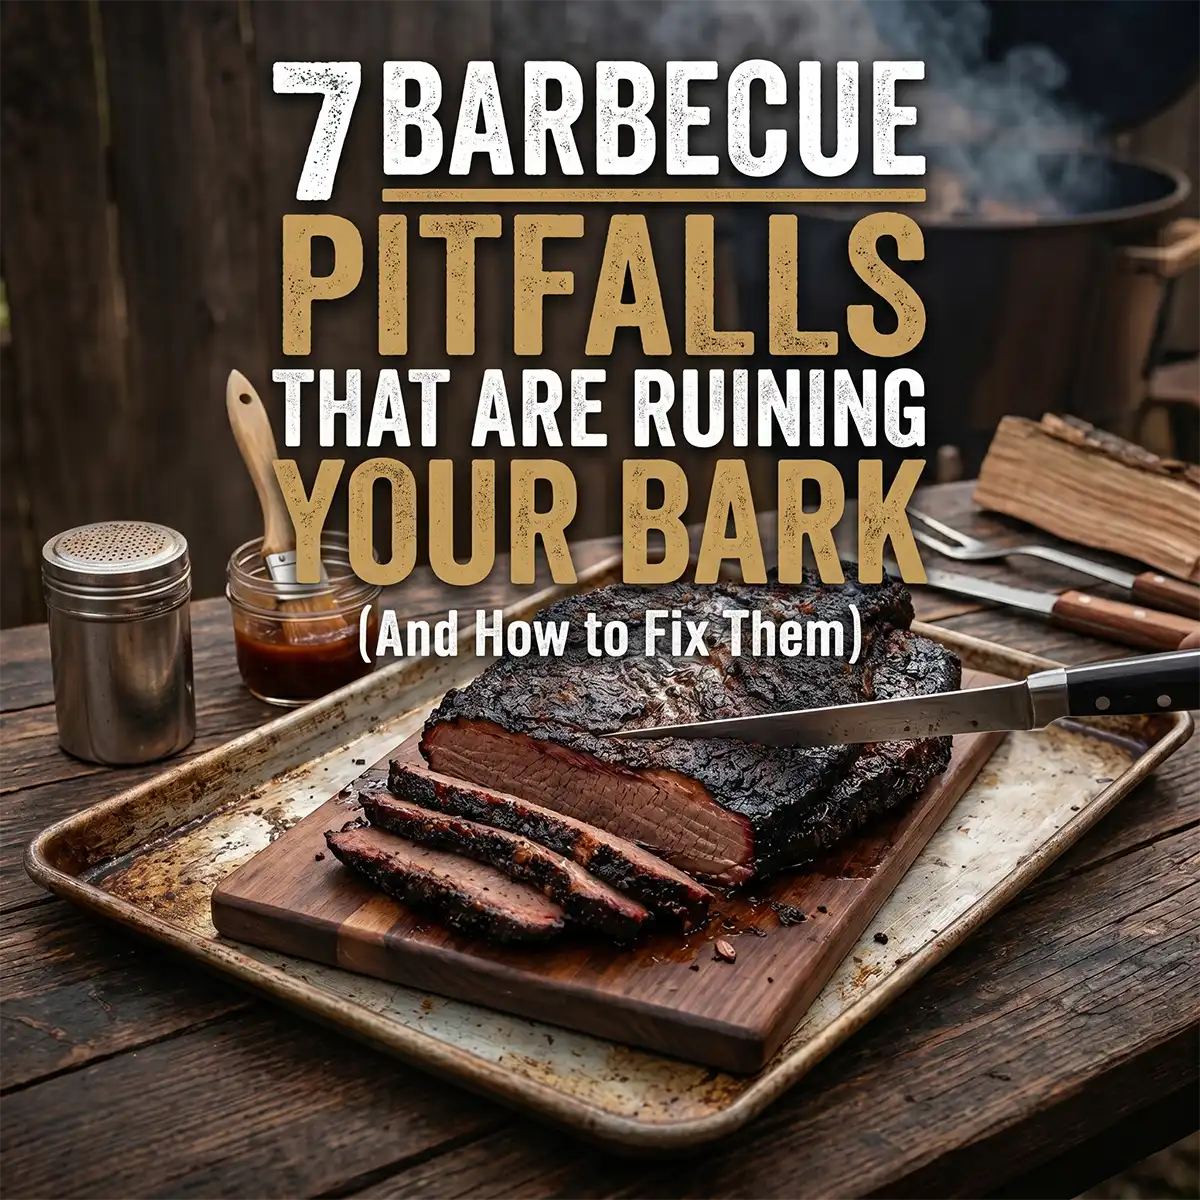
7 Barbecue Pitfalls That Are Ruining Your Bark (And How to Fix Them)
The difference between mediocre backyard barbecue and true, smokehouse-quality meat doesn’t come down to a secret sauce. It comes down to technique, fire management, and avoiding the foundational errors that plague novice cooks.
If your brisket is coming out dry, or your ribs have a bitter aftertaste, you are likely fighting your own equipment. Here is a breakdown of the seven most common smoking mistakes and the professional techniques required to fix them.
1. The Butchery Blunder: Trimming Like an Amateur
Hacking at a brisket or pork shoulder with a standard, dull chef’s knife destroys the aerodynamic shape necessary for smooth smoke flow. Jagged edges burn up, and thick pockets of unrendered fat prevent smoke penetration. You need to sculpt the meat, aiming for a perfectly even, aerodynamic ¼-inch fat cap. Invest in a specialized, highly maneuverable trimming blade to glide through silver skin and hard fat seamlessly.
Check Trimming Knives on Amazon2. The Binder & Bark Burial: Over-Seasoning
Amateurs often bury their expensive cuts under an inch of fine, powdery rub, effectively creating a barrier that blocks the smoke. To build a highly textured, professional bark, you need a coarse, heavy salt and pepper base—like a robust Cattleman’s Cure blend. Apply it with enough restraint that you can still see the actual meat through the seasoning. Let the smoke do the heavy lifting; the rub should only complement it.
3. Fueling the Disaster: Cheap Briquettes and Wet Wood
Throwing cheap, chemical-soaked briquettes or unseasoned, sappy wood into a long cook guarantees erratic temperature swings and foul-tasting meat. Professional results demand dense, consistent fuel. Whether you are running an offset or a pellet system, stick to premium lump charcoal or 100% natural hardwood pellets (like hickory or post oak). Consistent fuel provides the stable foundation your fire needs for a 14-hour run.
Check Hardwood Pellets on Amazon4. Choking the Fire: Ignoring Your Exhaust
If your smoker is billowing thick, puffy white smoke, your fire is suffocating. That white cloud is entirely uncombusted particulate that will coat your food in a bitter, numbing creosote. Your goal is efficient combustion that produces a thin, almost invisible clear-blue haze. Dial in your airflow, ensure your wood has enough oxygen to ignite cleanly, and never put your meat on the grates until that blue smoke is established.
5. The Cold Start Shock: Skipping the Temper
Throwing a massive, fridge-cold cut of beef onto unheated steel is a massive shock to the cooking environment. It plummets the ambient temperature of the chamber and makes your cook time impossible to predict. Allow your smoker at least 45 minutes to preheat and stabilize its steel walls. Simultaneously, let your protein rest on the prep table to take the chill off before it ever meets the grates.
6. Losing the Heat: Peeking and Rushing
“If you’re lookin’, you ain’t cookin’.” Every time you lift the lid to inspect your bark, you bleed out all the humidity and radiant heat the smoker has worked to build. This stalls the cook and leads to tough, chewy meat. You must trust your instruments. Utilize a wireless multi-channel probe system to track both the ambient grate temperature and the internal core of the meat simultaneously, ensuring you maintain absolute control without ever breaking the seal.
The Best Wireless Probes7. The Slicing Tragedy: Refusing to Rest
Pulling a large cut at 203°F and immediately slicing it on the cutting board is the ultimate barbecue tragedy; the heat will force every drop of moisture out onto the table. The meat requires a long, slow rest to allow the juices to wick back into the muscle fibers. Wrap your finished cook tightly in unwaxed pink butcher paper, wrap that in an old towel, and place it inside a heavy-duty 22 QT wheeled cooler. This “faux cambro” technique safely holds the meat above the 140°F danger zone for 4 to 6 hours, yielding flawless, edge-to-edge moisture when you finally carve.